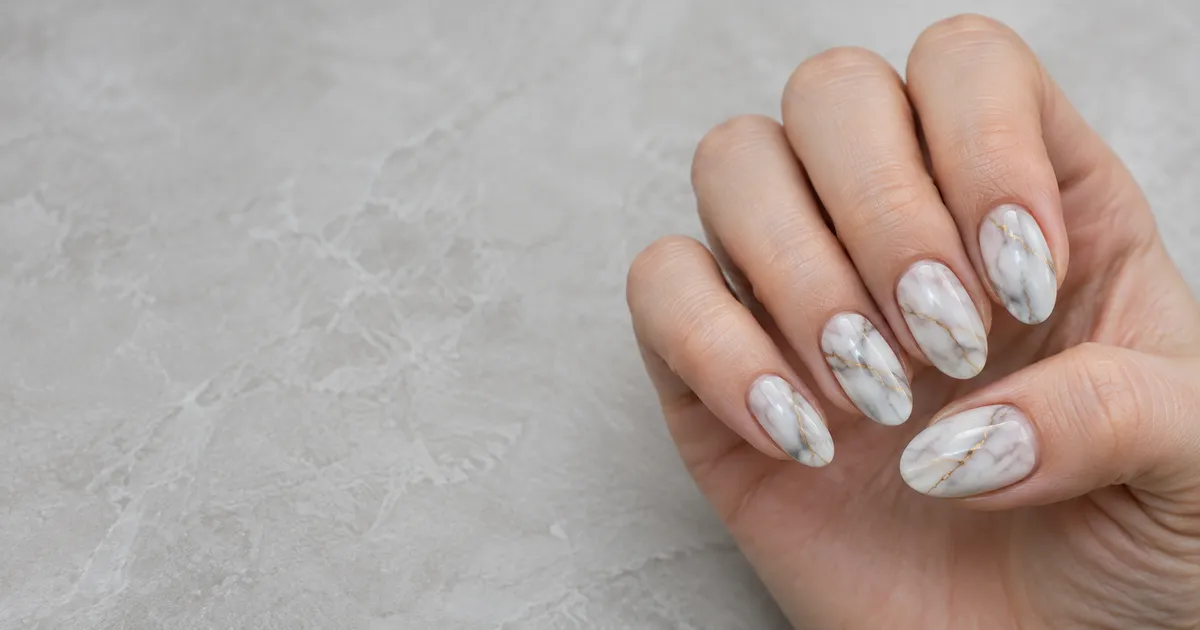
TL;DR. Marble nails copy the soft veins and cloudy patches of natural stone. There are four main ways to do them: dabbing crumpled plastic wrap into wet polish, placing color on clear blooming gel, water marbling in a cup of water, and using ready-made stickers. Blooming gel gives the most realistic stone, plastic wrap is the easiest with regular polish, and stickers are the fastest. White Carrara with gray veins is the classic, while black and gold, green malachite and pink quartz are popular variations.
What are marble nails?
Marble nails imitate polished stone. Most designs have a light or dark base, cloudy patches of a second color and thin, wandering veins. Some add gold or silver lines for the look of a mineral vein.
Good marble looks random but not busy. Real stone has a few strong veins and lots of soft, blurred areas in between. Keep that in mind and every method below gets easier.
Four ways to make marble nails
- Plastic wrap. Crumpled plastic wrap is dabbed into wet polish to lift some of it and leave a mottled stone texture. Easy and cheap with regular polish.
- Gel blooming. Color is placed on a layer of clear blooming gel that has not been cured, and it spreads into soft clouds on its own. This is the most realistic method and the one many salons use.
- Water marble. Drops of polish are floated on water in rings, swirled with a toothpick, and the nail is dipped through the pattern. It gives flowing swirls and takes practice.
- Stickers and wraps. Printed marble stickers or nail wraps. The fastest option, with an even pattern every time.
If you are new to nail art, start with plastic wrap or stickers. Our guide to easy nail art for beginners covers the basic tools.
How to do marble nails with plastic wrap
You need a base coat, a white or light polish, a gray or second color, a dark polish for veins, plastic wrap, a thin striping brush and a glossy top coat.
- Paint the base. Apply a base coat, then two coats of white. Let them dry fully.
- Prepare the wrap. Crumple a small piece of plastic wrap into a loose ball with lots of folds.
- Add the second color. Paint a thin coat of gray over one nail at a time.
- Dab. While the gray is still wet, press the wrap onto the nail and lift it straight off. Turn the wrap between dabs so the pattern does not repeat.
- Soften. If the texture looks too strong, paint a very thin coat of sheer white or milky polish over it.
- Add veins. Dip the striping brush in dark gray or black, wipe most of it off and pull a thin, slightly wobbly line across the nail. Add one or two thin branches.
- Seal. Finish with a glossy top coat and cap the free edge.
How to do blooming gel marble nails
Blooming gel is a clear gel that lets color spread out softly before it is cured. Timings vary between products, so read the instructions first.
- Prep and base. Prep your nails, then apply a gel base coat and a white or nude gel color, curing each layer.
- Apply blooming gel. Paint a thin layer of blooming gel over the nail. Do not cure it.
- Place the color. With a thin brush, dot or draw thin lines of gray or another gel color onto the wet blooming gel. Watch it spread into soft clouds.
- Cure. When the spread looks right, cure. The longer you wait, the more it spreads.
- Add sharp veins. Draw a few fine lines with a gel liner or gold gel, then cure.
- Top coat. Apply a gel top coat, cure and wipe if your top coat needs it.
Keep uncured gel off your skin and cure every layer fully. Gel products can cause skin allergies in some people. If your skin becomes itchy, red or swollen, stop and see a doctor or dermatologist. Our gel manicure at home guide covers safe gel basics.
Water marble and marble stickers
For water marble, fill a small cup with room-temperature filtered water. Protect the skin around your nail with tape or a peel-off barrier. Drop one polish onto the water, then drop another into its center, and repeat to build rings. Drag a toothpick through the rings to make a pattern, then dip your nail through it. Clean the leftover polish off the water's surface with the toothpick before you lift the nail out. Fresh, thin polishes spread best.
Marble stickers and wraps are the quickest way to get the look. Apply them to a clean, dry nail, file off the extra at the tip and seal with top coat. They are a good choice before an event if you have no time to practice.
12 marble nail ideas
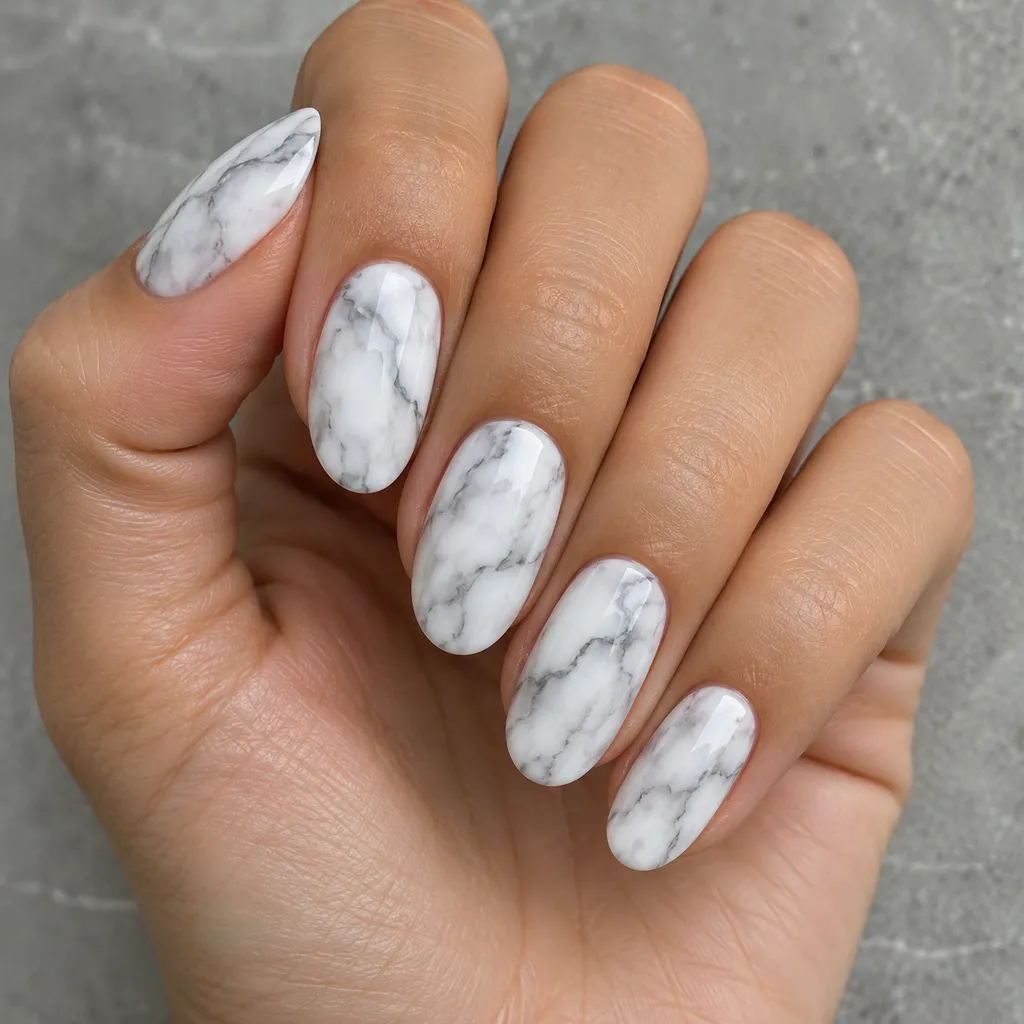
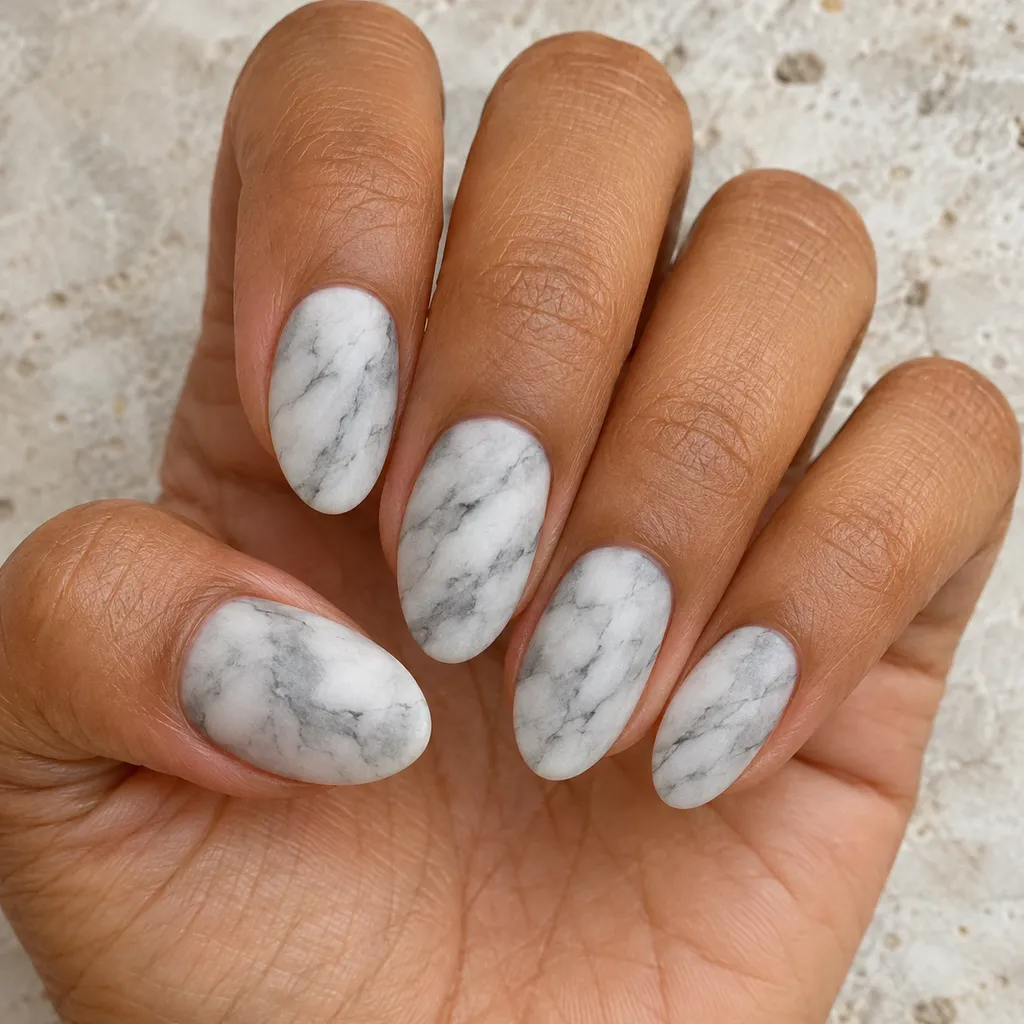
- White Carrara marble. A white base with soft gray clouds and thin gray veins. The classic, and it goes with everything.
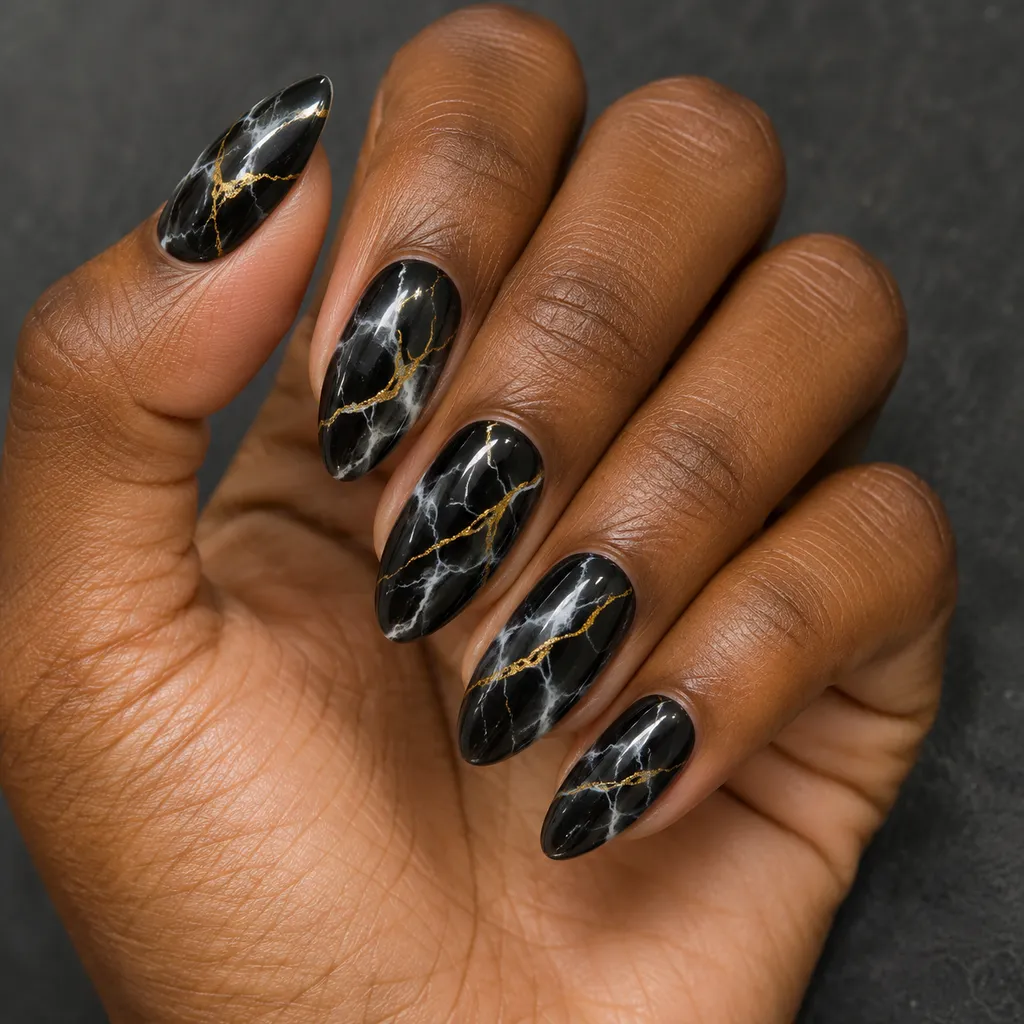
- Black and gold marble. A glossy black base with white veins and fine gold lines. Elegant for evenings.
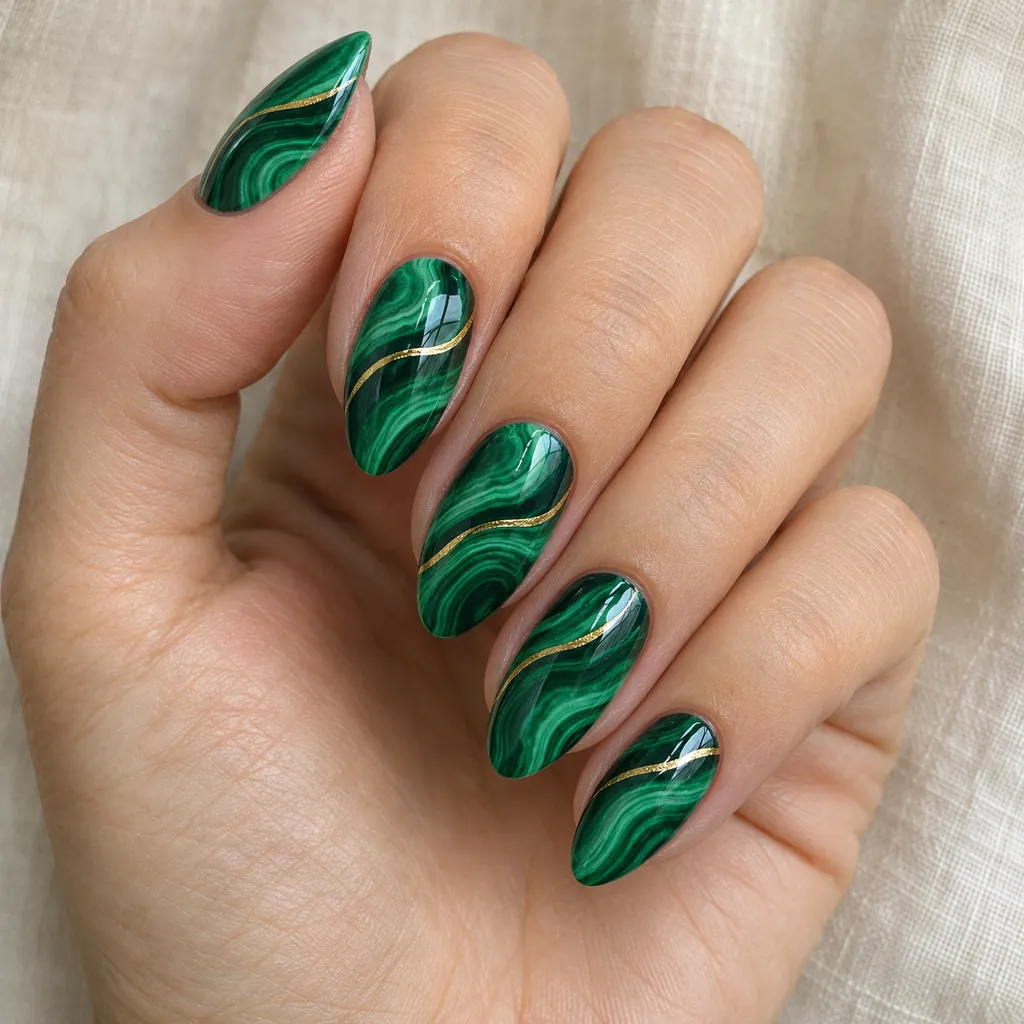
- Green malachite. Curved bands of emerald, deep green and near-black across the nail, sometimes with a gold line. Malachite has curved stripes rather than veins.
- Pink quartz. A soft pink base with white and pale rose clouds and a few faint veins. Gentle and romantic.
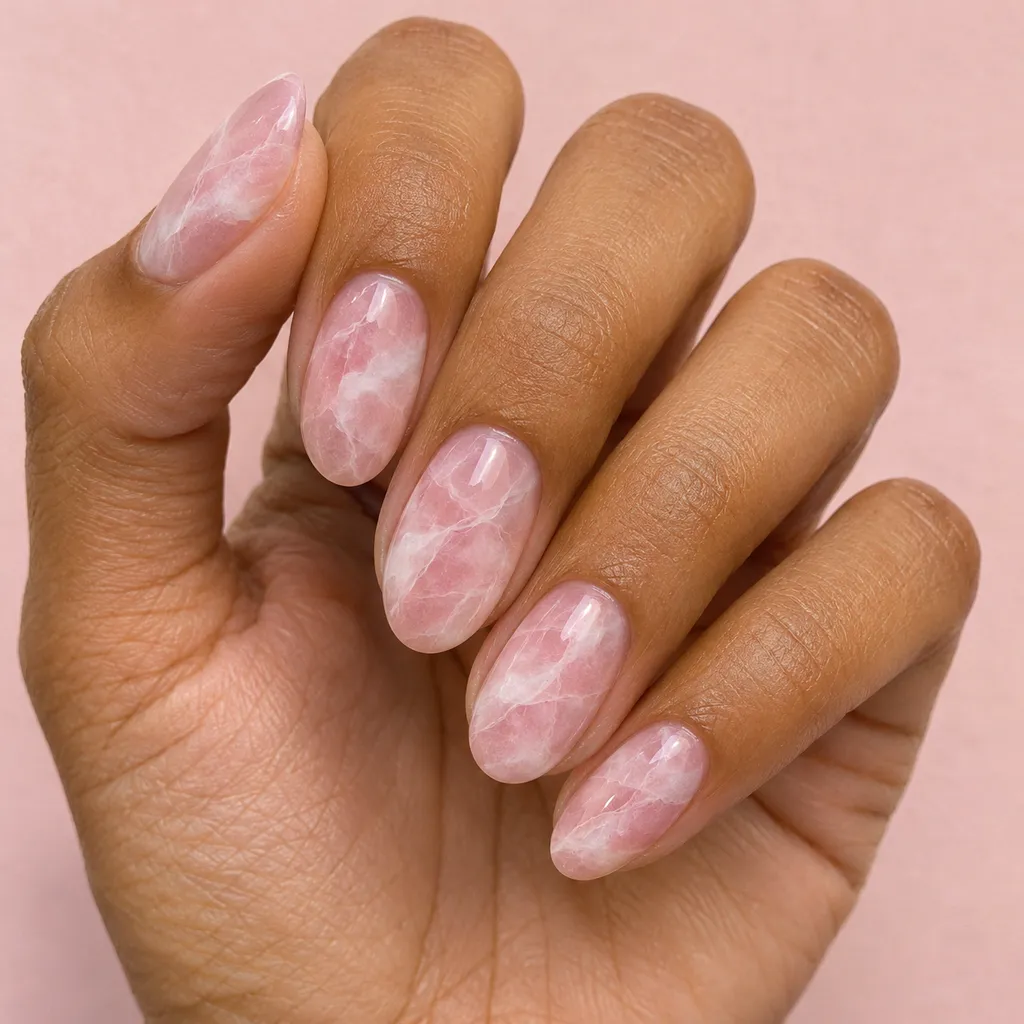
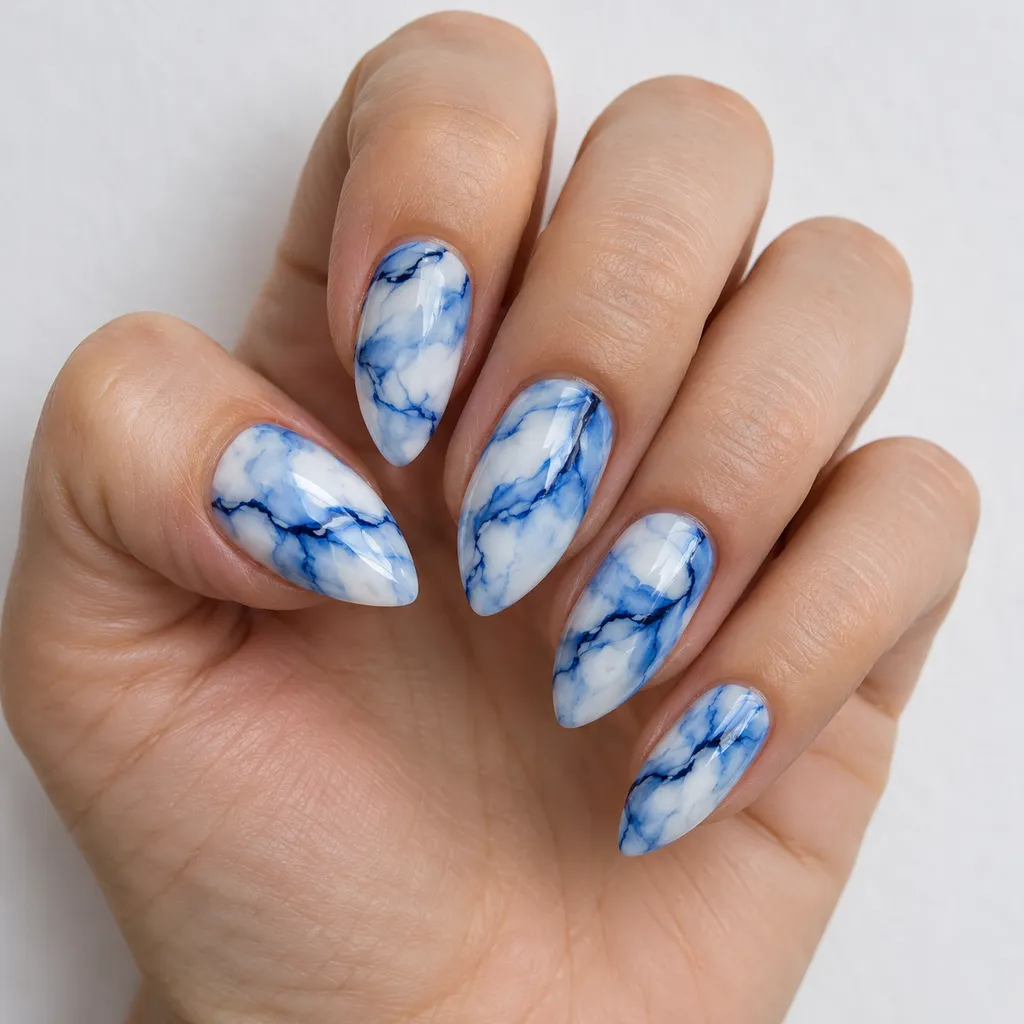
- Blue marble. A white base with navy or cobalt veins and soft blue clouds.
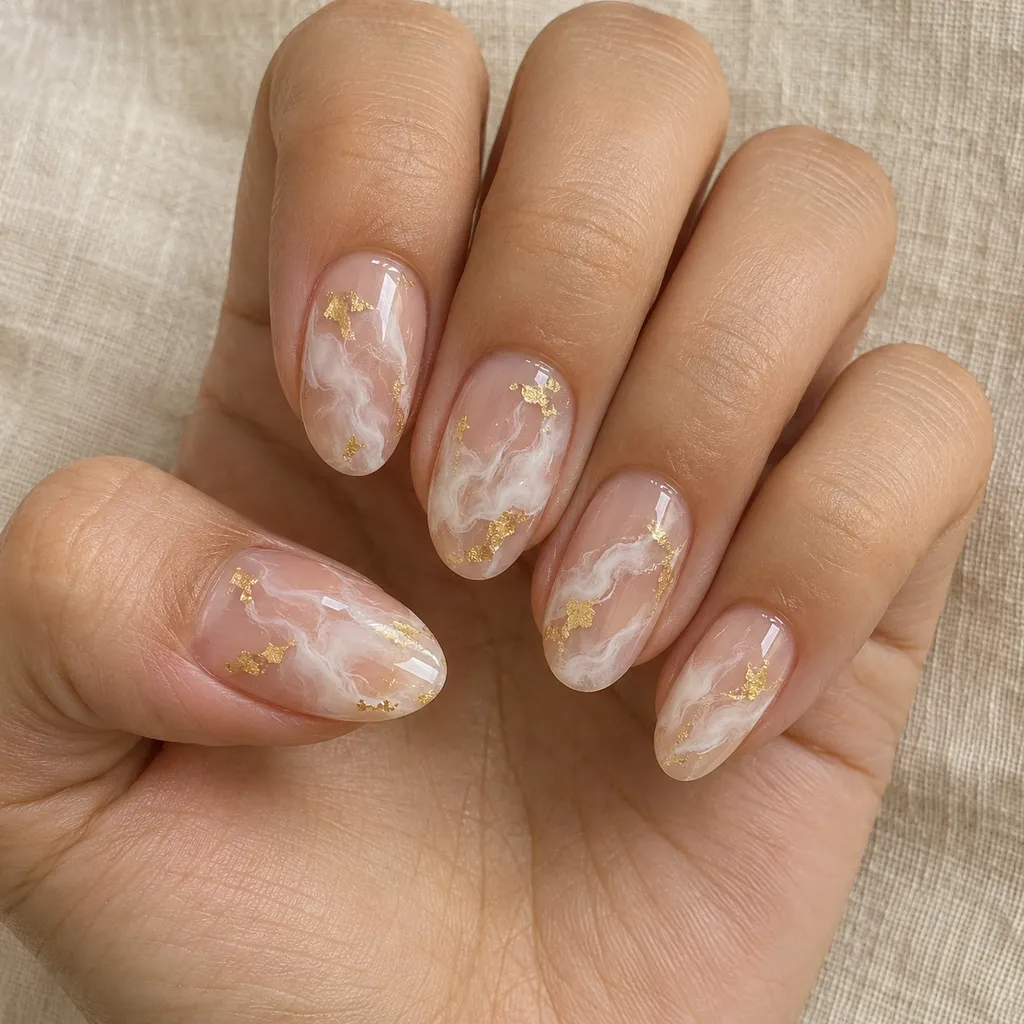
- Nude marble with gold foil. A sheer nude base with soft white clouds and small flakes of gold foil.
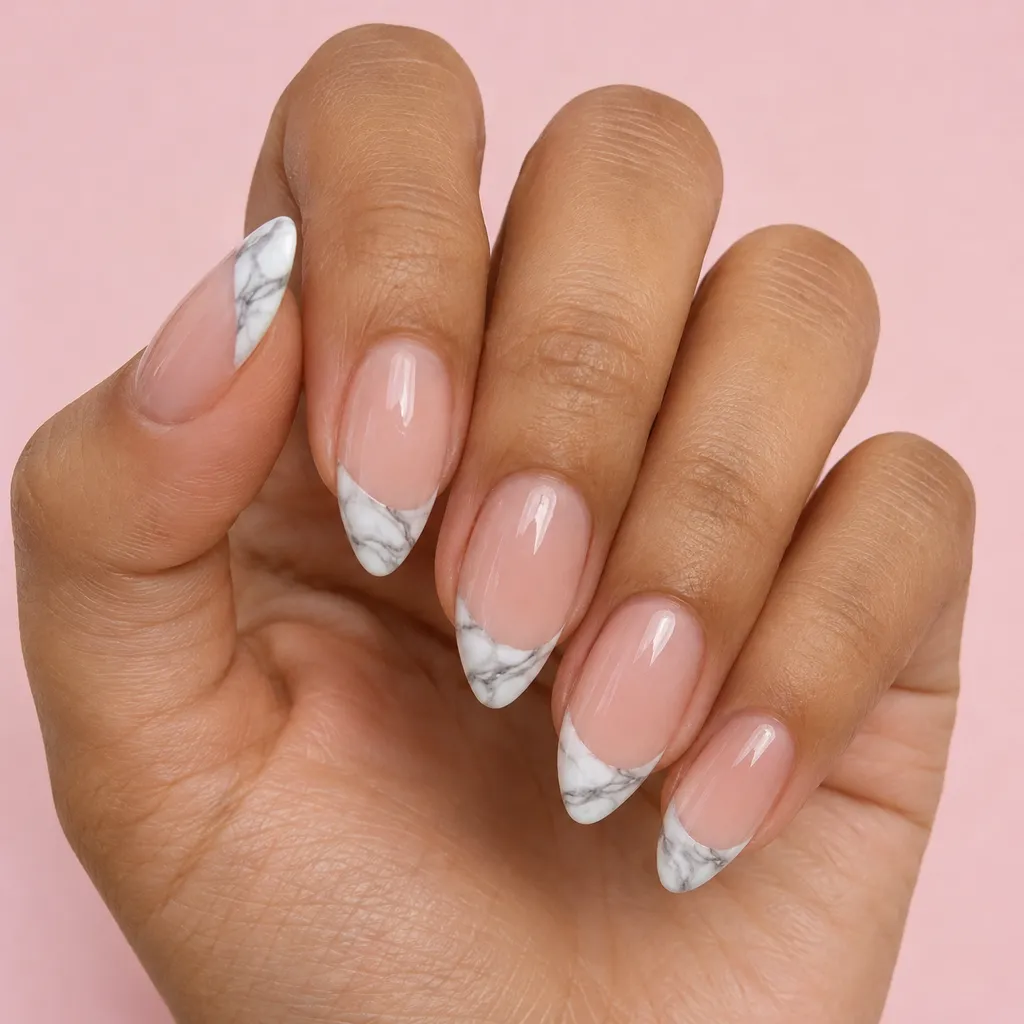
- Marble French tip. A sheer pink base with white marble only on the tips.
- Marble accent nail. One marble nail on each hand, with solid colors taken from the stone on the others, such as white and soft gray.
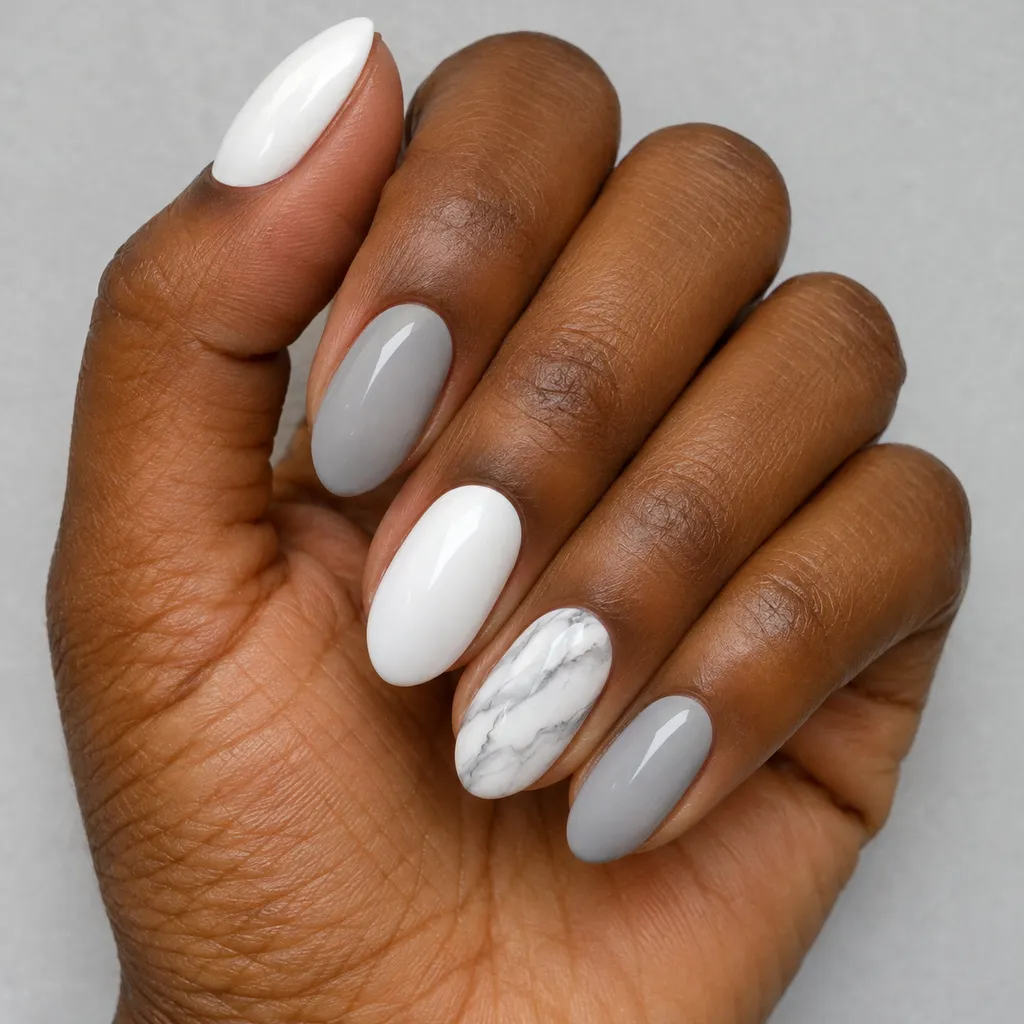
- Smoky gray marble. A light gray base with darker, smoky clouds and almost no veins. Soft and modern.
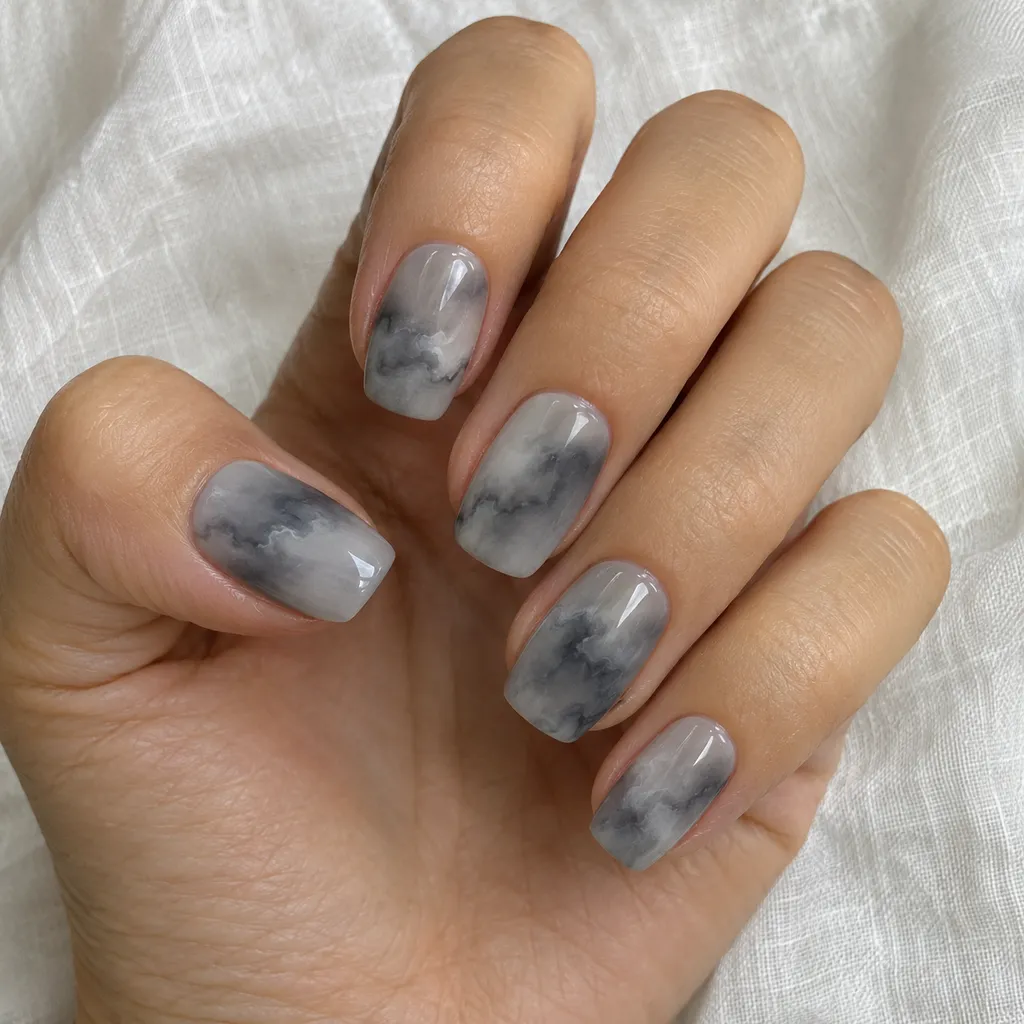
- Amethyst marble. A lilac base with violet and deep purple clouds and thin white veins.
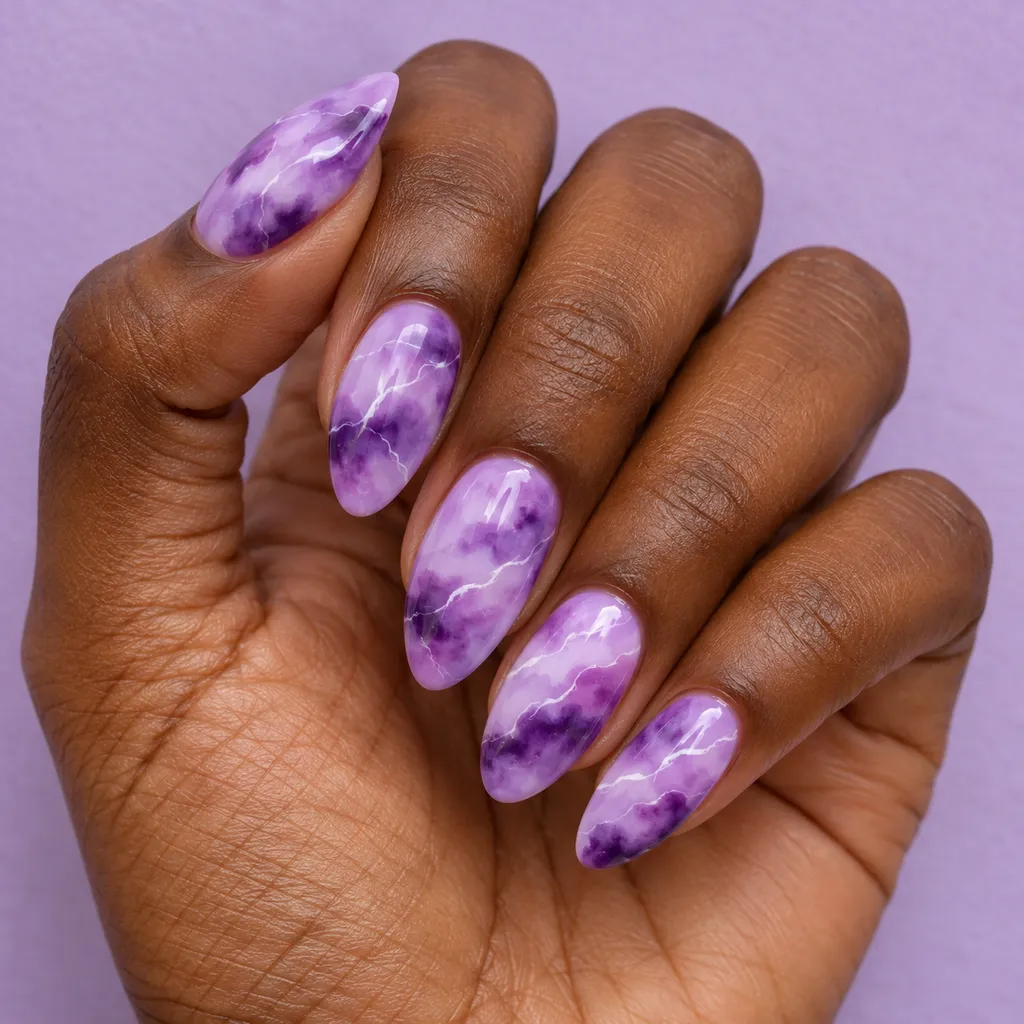
- Burgundy marble. A deep wine base with blush pink veins and a touch of gold. Rich for winter.
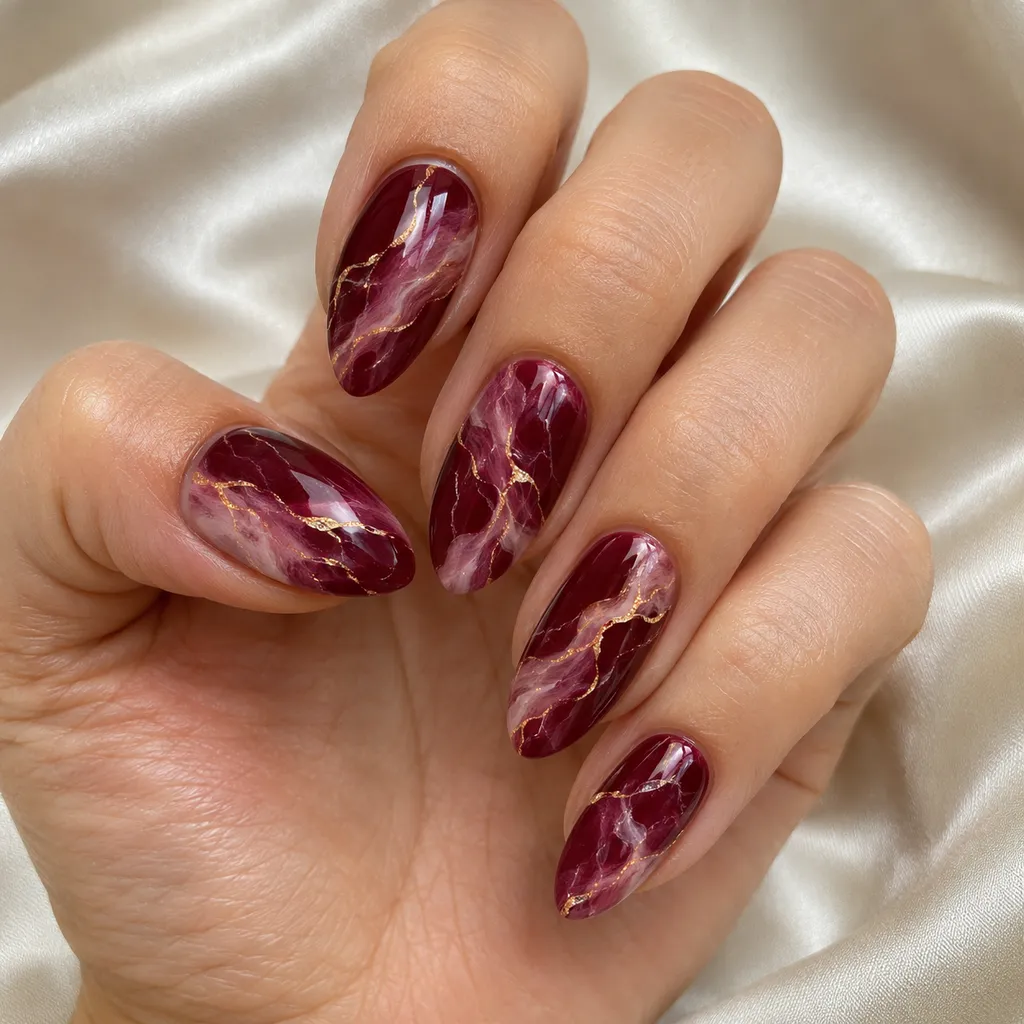
- Matte marble. White marble under a matte top coat. It looks like honed stone rather than polished stone.
Fixing common marble nail mistakes
- Veins are too thick. Wipe most of the color off the brush and use a lighter hand. Wobble the brush a little as you pull it.
- It looks too busy. Use fewer veins. Two main lines and a few small branches per nail is plenty.
- Colors look muddy. Let each layer dry before the next one, and stick to two or three colors.
- Blooming gel spread too far. Cure sooner, or use a thinner layer of blooming gel.
- Water marble will not spread. The polish may be too thick or the water too cold. Use fresh, thinner polish and room-temperature water, and work quickly.
- Bubbles or texture. Use thin layers, roll the bottle instead of shaking it, and finish with a thick, glossy top coat.
Best shapes and how long marble nails last
Marble needs a little room to look like stone, so medium and long nails show it best. On short nails, keep the pattern simple with one or two veins. Almond, oval, coffin and square all work. See our almond nail designs and oval nail designs for shape ideas.
Marble done with regular polish often lasts several days to about a week. Gel marble usually lasts 2 to 3 weeks; see how long gel nails last. Stickers often last a few days to a week, depending on the product and your top coat.
Try marble nails on your own hand
Marble can look soft or bold depending on the colors and the number of veins. In the CutieCure app, you can design your own nails by describing a look, such as white Carrara marble with gold veins on oval nails. The AI generates the design on a photo of your own hand in a few seconds, so you can compare stone colors and save your favorite to show your technician.
Frequently asked questions
What is the easiest way to do marble nails at home?
Stickers are the fastest. With regular polish, the plastic wrap method is the easiest: dab crumpled plastic wrap into a wet second color over a dry base, then add a few thin veins.
What is blooming gel?
Blooming gel is a clear gel that you leave uncured while you place color on it. The color spreads into soft clouds, and you cure it when the spread looks right. It is a popular way to create marble in salons.
Can you do marble nails with regular polish?
Yes. The plastic wrap method and water marble both use regular polish. Let the base dry fully, keep layers thin and finish with a glossy top coat.
How long do marble nails last?
Regular polish often lasts several days to about a week, gel usually lasts 2 to 3 weeks, and stickers often last a few days to a week.
Why does my water marble polish not spread?
The polish may be too thick or old, or the water may be too cold. Use fresh, thin polish and room-temperature filtered water, and drop each color quickly.
Preview your marble nails first
Free to download. Describe a marble design in CutieCure and see it generated on a photo of your own hand before you book or start practicing.
Download CutieCure Google PlayRelated guides
- Easy nail art for beginners
- Gel manicure at home
- Glitter nails: 15 holiday ideas
- Nail art idea generator
Related free tools
- Nail art idea generator: Generates nail art ideas by occasion, season, length and style.
- Nail polish drying time calculator: Estimates touch-dry and fully set times for regular, quick-dry, gel and dip powder manicures.